Glossary (Technical Terms and their Definitions)
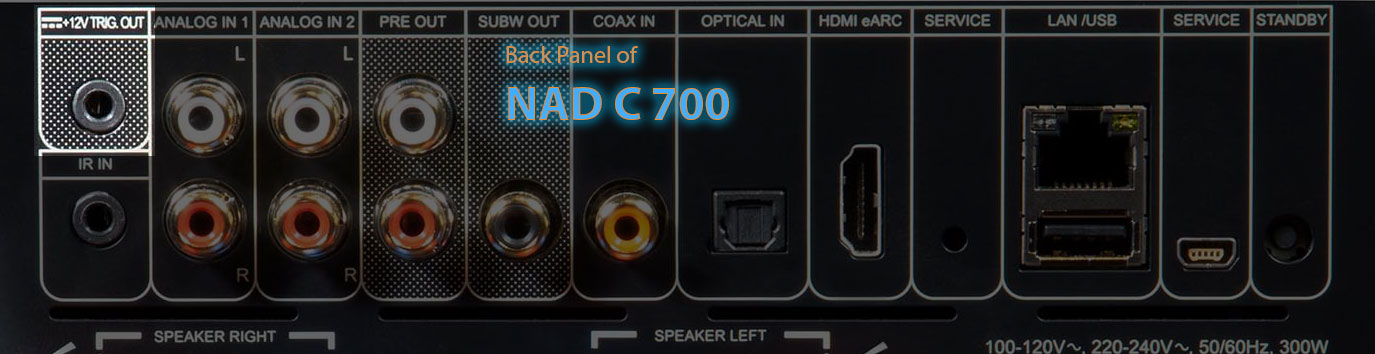
A 12V trigger is a control mechanism used in audio/video systems and home automation setups. It involves sending a 12-volt electrical signal (often low voltage) to trigger specific actions in compatible devices. These triggers are commonly used to coordinate the power state and actions of various components in a multimedia or home theatre system. Here's how it generally works:
-
Control Device (Transmitter): This device, such as an AV receiver, preamplifier, or home automation controller, generates a 12V trigger output signal.
-
Trigger Cable: A specialised cable with a 3.5mm mono jack on each end is used to carry the 12V trigger signal. One end is connected to the control device's trigger output, and the other end is connected to the trigger input on the target device.
-
Target Device (Receiver): This device could be a power amplifier, motorised projector screen, motorised curtains, cooling system, or any other equipment that needs to be controlled based on trigger signals.
When the control device sends out the 12V trigger signal, the target device responds accordingly. Common scenarios include:
-
Power On: When the control device powers on, it sends a 12V trigger signal to the target device, causing it to turn on as well. This is especially useful for amplifiers, subwoofers, or other components that should be active when the system is in use.
-
Power Off: Conversely, when the control device is powered off, it can send a 12V trigger signal to the target device, prompting it to power down. This ensures that all components shut down in a synchronised manner.
-
Other Actions: 12V triggers can also be used for actions beyond powering on/off, such as activating ventilation systems, adjusting lighting, or even triggering motorised mechanisms like projector lifts.
This automation simplifies the user experience and ensures that devices work harmoniously without the need for manual intervention. However, it's essential to ensure compatibility between devices, as not all components support 12V trigger functionality. Some systems also offer multiple trigger outputs or inputs, allowing for more complex setups where a single control signal can manage several devices simultaneously.
-
-
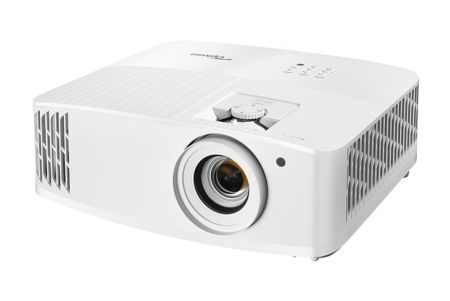 Optoma UHD55 4K HDR Smart Gaming Home Projector | 3600 LumensRegular Price $2,999.00 Special Price $2,399.00
 -
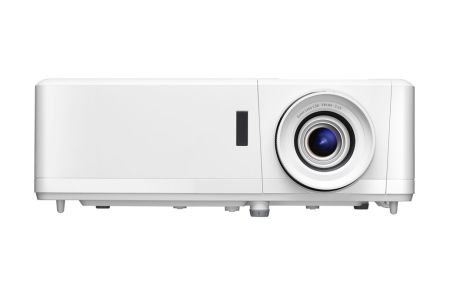 Optoma UHZ50 Smart 4K UHD Laser Home Cinema ProjectorRegular Price $5,299.00 Special Price $5,193.00
 -
 Pioneer VSX-LX305 9.2 CH Home Cinema AV Receiver / Amplifier | IMAX Enhanced | Smart Voice Control | Bluetooth | Online Music Streaming | Roon TestedRegular Price $2,399.00 Special Price $1,999.00
 -
 Marantz NR1510 5.2 Channel Ultra-Slim Home Theatre Receiver | Bluetooth® | 6 HDMI | Dolby Vision | Wi-Fi | AirPlay 2Regular Price $1,199.00 Special Price $1,090.00
A

An Analog RCA (Radio Corporation of America) input refers to a type of audio or video connection commonly used to transmit analog signals between devices. RCA connectors are typically color-coded, with red and white connectors used for stereo audio (right and left channels) and yellow connectors used for composite video. These connectors are widely found on various audio and video equipment, such as TVs, DVD players, game consoles, amplifiers, and more.
Analog RCA inputs are capable of transmitting analog signals, which means they can carry continuous voltage variations corresponding to the audio or video signal. However, they are not as capable of transmitting high-definition signals as some digital alternatives, such as HDMI or optical connections. The quality of the signal transmitted through RCA inputs can be susceptible to interference and degradation over longer distances, and they might not support advanced audio formats like Dolby TrueHD or DTS-HD Master Audio.
It's important to note that as technology has advanced, many modern devices are transitioning away from analog RCA connections in favor of digital connections like HDMI, DisplayPort, and optical audio. These digital connections provide higher quality, support for high-definition video and audio formats, and often carry additional features like Ethernet connectivity and control signals.

Aspect ratio refers to the proportional relationship between the width and height of an image, screen, or display. It is expressed as a ratio of the width to the height. Aspect ratio is an important consideration in various forms of media, including television, movies, computer monitors, and digital content.
Common Aspect Ratios:
-
4:3 (1.33:1): This aspect ratio was standard for older television broadcasts and early computer monitors. It is relatively more square in shape.
-
16:9 (1.78:1): Also known as widescreen, this is the most common aspect ratio for modern high-definition television (HDTV) and computer monitors. It provides a wider viewing area.
-
21:9 (2.33:1): This ultra-wide aspect ratio is often used in cinematic displays, offering an even wider and more immersive viewing experience, particularly popular for gaming and some movie formats.
-
2.39:1 and 2.40:1: These are common aspect ratios for many movies, especially those presented in widescreen formats in theaters. They provide a wide cinematic scope.
Aspect ratio is a critical factor in how content is displayed. For example, if you have a movie with a widescreen aspect ratio (e.g., 2.39:1) and you watch it on a 16:9 TV, you might see black bars at the top and bottom of the screen to maintain the original aspect ratio.
It's worth noting that aspect ratios can affect how content is displayed and how it appears on different screens. Some content might be cropped or letterboxed (with black bars) to fit a particular aspect ratio, while other content might be stretched or distorted if not displayed at its intended aspect ratio.
When working with displays or media content, understanding aspect ratios can help you choose the appropriate settings and ensure that your content is displayed correctly and aesthetically.
Auro-3D is a three-dimensional audio technology primarily designed for enhancing the listening experience in home theatres and cinemas. It aims to create a more immersive and realistic sound environment by adding height information to traditional surround sound setups. This technology was developed by the Belgian company Auro Technologies.
Auro-3D expands upon the concept of traditional surround sound, which typically uses a combination of speakers placed around the listener to create a sense of spatial audio. Auro-3D introduces height channels in addition to the usual horizontal surround channels. This allows for more precise positioning of sound objects, giving listeners a sense of sound coming from above and below as well as from all around them.
The Auro-3D system typically utilizes three layers of speakers:
-
Traditional Surround Layer (5.1 or 7.1): This layer corresponds to the usual speakers placed around the listener at ear level.
-
Height Layer (5.1 or 7.1): Speakers are placed above the listener to create the sense of sound coming from above, enhancing the vertical dimension of the audio.
-
Top Layer (1 or 2 speakers): These speakers are positioned directly above the listener, providing additional height cues for an even more immersive experience.
Auro-3D technology is supported by compatible audio equipment, including A/V receivers, processors, and speaker systems. It's important to note that content needs to be specifically mixed or encoded in the Auro-3D format to take advantage of its features. Various movies and music albums have been released in Auro-3D, enabling listeners to experience a heightened level of audio immersion.
It's worth mentioning that Auro-3D is one of several competing 3D audio technologies, with others including Dolby Atmos and DTS:X. Each of these technologies aims to achieve similar immersive audio experiences but may have differences in their implementation and compatibility with different playback systems.


B

"Bridge mode" in the context of audio amplifiers refers to a configuration where two amplifier channels are combined to drive a single speaker or load. This mode can potentially increase the power output to the speaker, delivering more wattage for increased volume and audio performance. The power output in bridge mode depends on the amplifier's specifications and the impedance of the speaker or load being driven.
When amplifiers are bridged, the output voltage of one channel is inverted and then combined with the other channel's output voltage. This effectively doubles the voltage available to the load, which can lead to higher power output. However, the impedance of the load also plays a crucial role in determining the power output.
Here's a simplified formula to calculate the power output in bridge mode:
Power Output = (Voltage^2) / Load Impedance
Where:
- Voltage is the bridged output voltage.
- Load Impedance is the impedance of the speaker or load.
Keep in mind that not all amplifiers are capable of being bridged, and attempting to bridge an amplifier that is not designed for it can result in damage to the amplifier or poor audio quality.
Before attempting to bridge an amplifier, it's important to consult the amplifier's user manual and specifications to ensure that it supports bridge mode and to understand the specific power output capabilities in this mode. Additionally, be mindful of the impedance ratings and compatibility between the amplifier and the speaker or load to achieve the best audio performance and avoid any potential issues.
A "Built-in DAC" refers to a digital-to-analog converter that is integrated directly into an electronic device, such as a smartphone, laptop, audio player, or headphone amplifier. The primary function of a DAC is to convert digital audio signals (binary data) into analog audio signals that can be played through speakers or headphones.
Digital audio signals, such as those from music files or streaming services, are stored and transmitted in a digital format (0s and 1s). To be heard as sound, these signals need to be converted into analog signals that can then be amplified and played through audio output devices.
Here's how a built-in DAC works:
-
Digital Input: The digital audio signal is received by the device, such as a smartphone or laptop.
-
DAC Conversion: The built-in DAC within the device converts the digital signal into an analog signal. This involves converting the binary data into continuous voltage levels that represent the audio waveform.
-
Analog Output: The analog signal is then passed to the device's headphone jack, speakers, or other audio output ports, where it is amplified and played as audible sound.
The quality of the DAC can significantly impact the audio quality you experience. A high-quality DAC can provide better accuracy and fidelity in the conversion process, resulting in clearer and more detailed audio output.
Many modern devices come with built-in DACs, and the quality of these DACs can vary based on factors such as the device's manufacturer, model, and intended use. Audiophiles and enthusiasts often pay attention to the quality of the built-in DAC when choosing devices for audio playback, as well as considering options for external DACs if they seek even higher audio performance.
-

-
 Audiolab Omnia Audio Player | Integrated Amplifier | CD Player | Network Streamer | Hi-Res AudioAs low as $2,474.00 Regular Price $3,300.00


C
D
Dirac Live® Room Correction is a sophisticated audio technology and software solution designed to optimize the sound quality and performance of audio systems, especially in room environments with acoustic challenges. It is developed by Dirac Research, a Swedish company specialising in digital sound optimisation.
The primary goal of Dirac Live® Room Correction is to address the acoustic issues present in a room that can negatively impact the listening experience. These issues include room resonances, reflections, standing waves, and other anomalies that can distort the audio playback.
Key features and benefits of Dirac Live® Room Correction include:
-
Measurement and Analysis: Dirac Live® measures the acoustic characteristics of your room and audio system using a calibrated microphone. It analyses the frequency response, phase, and time domain characteristics to identify problematic areas.
-
Customised Correction Filters: Based on the measurements, Dirac Live® generates custom correction filters that are applied to the audio signal. These filters aim to flatten the frequency response and correct phase and time domain issues, resulting in improved clarity and accuracy of sound reproduction.
-
Multi-Point Correction: Dirac Live® supports multi-point measurement and correction, allowing you to take measurements at multiple listening positions in the room. This ensures a more balanced sound across different seating locations.
-
Speaker Correction: In addition to room correction, Dirac Live® can also correct the frequency and phase response of individual speakers in your system, compensating for their inherent characteristics.
-
User-Friendly Interface: The software provides a user-friendly interface for setting up and configuring the correction process. It allows you to visualise the measurements and see the effects of the correction in real time.
-
Integration with Various Audio Systems: Dirac Live® can be integrated into various audio products, including AV receivers, preamplifiers, soundbars, and more. It can be applied to both stereo and multi-channel audio setups.
-
Tailored Sound: Dirac Live® aims to provide a tailored and accurate sound experience that is adapted to your specific room's acoustics and your audio system's characteristics.
It's important to note that while Dirac Live® Room Correction can significantly improve audio quality and address room-related issues, it is not a substitute for proper room acoustic treatment. In cases where severe acoustic problems exist, a combination of Dirac Live® and physical room treatment may be necessary for optimal results.
Overall, Dirac Live® Room Correction is a powerful tool for audiophiles, home theatre enthusiasts, and professionals who seek to achieve the best possible audio quality in their listening environments.
-
Pioneer VSX-LX305 9.2 CH Home Cinema AV Receiver / Amplifier | IMAX Enhanced | Smart Voice Control | Bluetooth | Online Music Streaming | Roon TestedRegular Price $2,399.00 Special Price $1,999.00
Dolby is a well-known audio technology company that has developed various audio processing and encoding technologies designed to enhance and improve the quality of sound in various entertainment and communication mediums. These technologies are widely used in theatres, home entertainment systems, mobile devices, and more. Here are some key Dolby sound technologies:
-
Dolby Digital (AC-3): Dolby Digital is a popular audio compression technology used for encoding multi-channel audio (5.1 or 7.1) in movies, TV shows, and DVDs. It provides high-quality audio while efficiently compressing data for storage and transmission. Dolby Digital is commonly used in home theatre systems.
-
Dolby TrueHD: Dolby TrueHD is a lossless audio codec used primarily for high-definition Blu-ray Discs and other media formats. It provides audio that is bit-for-bit identical to the original studio recording, ensuring high-fidelity sound.
-
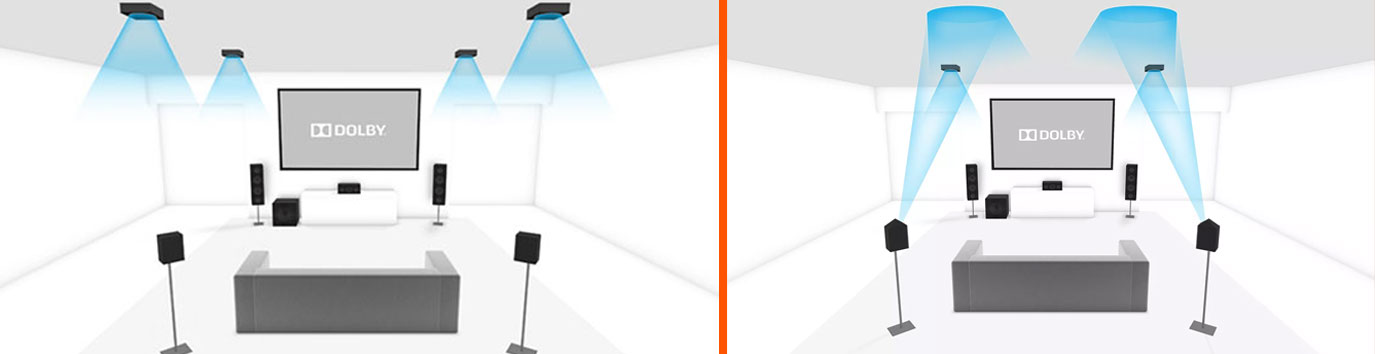
Dolby Atmos: Dolby Atmos is an advanced audio technology that adds height or overhead channels to create an immersive three-dimensional audio experience. It's used in theatres and home theatres to provide a more realistic and enveloping sound environment. Dolby Atmos can create the sensation of sound coming from all around and even above the listener.
-
Dolby Vision: While not exclusively an audio technology, Dolby Vision is a high dynamic range (HDR) video technology that enhances the visual quality of content by expanding the range of colours and brightness. It often pairs with Dolby Atmos to create a more immersive audiovisual experience.
-
Dolby Surround and Pro Logic: These are earlier audio processing technologies used to create a simulated surround sound experience from stereo or mono sources. They were used in older home theatre systems.
-
Dolby Voice: Dolby Voice is a suite of audio conferencing technologies that aims to provide clear and natural audio quality in teleconferencing and video conferencing. It reduces background noise, echoes, and other audio artifacts to make communication more effective.
-
Dolby Headphone and Dolby Virtual Speaker: These technologies are designed to create a virtual surround sound experience when listening through headphones or two-channel speaker systems.
-
Dolby Mobile and Dolby Digital Plus: These technologies are designed for mobile devices, improving audio quality and optimising sound for small speakers and headphones.
Dolby technologies are often found in products like home theatre systems, soundbars, headphones, mobile devices, movie theatres, and more. They have become synonymous with high-quality audio experiences and are widely used in the entertainment industry to create immersive and engaging soundscapes.
DTS (Digital Theatre Systems) is a company that specialises in developing advanced audio technologies aimed at enhancing sound quality and creating immersive audio experiences across various entertainment platforms. DTS technologies are commonly used in home theatres, cinemas, gaming, streaming services, and other audio-related applications. Some key DTS audio technologies include:
-
DTS:X: DTS:X is an object-based audio technology designed to create three-dimensional soundscapes. It allows sound to move freely around the listener in a three-dimensional space, including overhead, for a more immersive and lifelike audio experience. DTS:X is often used in home theatre systems and cinemas.
-
DTS-HD Master Audio: This technology is used for high-definition audio encoding, typically found on Blu-ray discs and other high-quality media. It provides lossless audio compression, preserving the original studio sound quality for a rich and dynamic audio experience.
-
DTS Neural:X: DTS Neural:X is an audio upmixing technology that enhances the listening experience by converting stereo or multichannel content into immersive audio formats. It can create a sense of height and spatial dimension even from standard audio sources.
-
DTS Virtual:X: DTS Virtual:X is an audio processing technology that simulates height and surround sound effects without requiring physical height or surround speakers. It's designed to enhance the audio experience for soundbars and other compact speaker setups.
-
DTS-HD High-Resolution Audio: This technology delivers high-quality audio with higher bit rates and sampling frequencies than standard-definition audio formats, resulting in improved audio clarity and detail.
-
DTS Sound Unbound: DTS Sound Unbound is a platform that supports advanced audio technologies like DTS:X and DTS Headphone:X for immersive 3D audio experiences in gaming and entertainment.
-
DTS Play-Fi: As mentioned earlier, DTS Play-Fi is a wireless audio streaming platform that enables multi-room audio playback, allowing users to enjoy synchronised audio across compatible devices throughout their home.
-
DTS Connect: DTS Connect is a technology used to encode and transmit multi-channel audio from a computer to external audio equipment, providing a high-quality audio experience for gaming, music, and movies.
These are just a few examples of DTS technologies. DTS continually innovates and develops new audio technologies to elevate the audio quality and realism in various entertainment experiences. Whether it's for home theatres, gaming, mobile devices, or other applications, DTS technologies aim to provide a more engaging and immersive audio environment.
-
 Audiolab 7000N PLAY Wireless Audio Streaming Player | DTS Play-Fi® TechnologyAs low as $975.00 Regular Price $1,300.00
E
F
H
There are several types of headphones, each with its own design, features, and intended use. The choice of headphone type depends on factors such as comfort, sound quality, portability, and the specific activities for which you plan to use them. Here are some common headphone types:
-
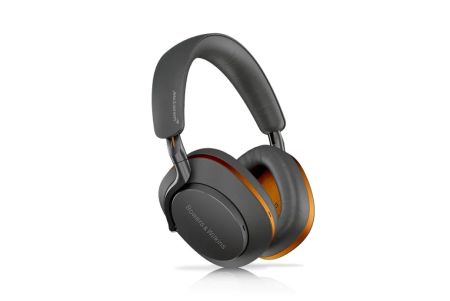
Over-Ear Headphones (Circumaural): These headphones have ear cups that fully enclose the ears. They offer excellent sound quality, comfort for extended use, and effective noise isolation. Over-ear headphones are often used for critical listening, studio monitoring, and immersive gaming experiences.
-
On-Ear Headphones (Supra-aural): On-ear headphones rest on the ears without fully enclosing them. They are more compact and portable than over-ear headphones, but they may provide slightly less noise isolation and bass response. On-ear headphones are suitable for general listening and commuting.
-
In-Ear Monitors (IEMs): These are small headphones that fit directly into the ear canal. They offer good noise isolation and portability. IEMs are commonly used by musicians, audio professionals, and individuals who want a compact and discreet listening solution.
-
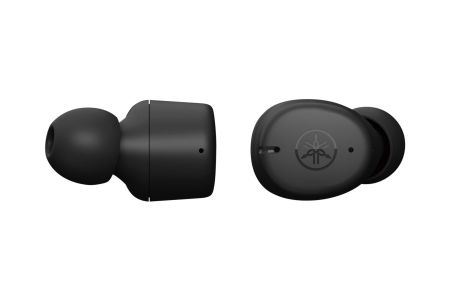
Earbuds: Earbuds are small headphones that sit loosely in the outer ear. They are often included with portable devices and offer basic sound quality and convenience. However, they may not provide a secure fit or optimal sound isolation.
-
Wireless Headphones: Wireless headphones use Bluetooth or other wireless technologies to connect to devices without the need for cables. They come in various styles, including over-ear, on-ear, and in-ear options. Wireless headphones are convenient for activities that require freedom of movement, such as workouts and commuting.
-
Noise-Canceling Headphones: These headphones feature active noise-canceling technology to reduce or eliminate ambient background noise. They are ideal for travel, noisy environments, and situations where you want to focus on your audio content.
-
Gaming Headsets: Gaming headsets are designed with features such as a built-in microphone, virtual surround sound, and ergonomic design for extended gaming sessions. They are popular among gamers and those who engage in online communication.
-
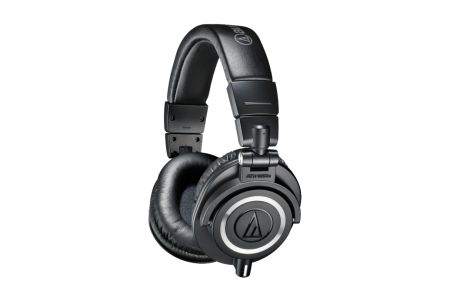
Studio Monitor Headphones: These headphones are designed for accurate audio reproduction and are commonly used by audio engineers and musicians for mixing and recording purposes.
-
Sports and Fitness Headphones: These headphones are designed to stay securely in place during physical activities. They are often sweat-resistant and offer features tailored for workouts and outdoor activities.
-
Open-Back and Closed-Back Headphones: Some over-ear headphones have open-back or closed-back designs. Open-back headphones allow some sound leakage and offer a more natural soundstage, while closed-back headphones provide better isolation and a more focused sound.
When choosing headphones, consider your preferences for sound quality, comfort, noise isolation, portability, and any specific activities you'll be using them for. Keep in mind that different headphone models within each type can vary in terms of sound signature, build quality, and additional features.
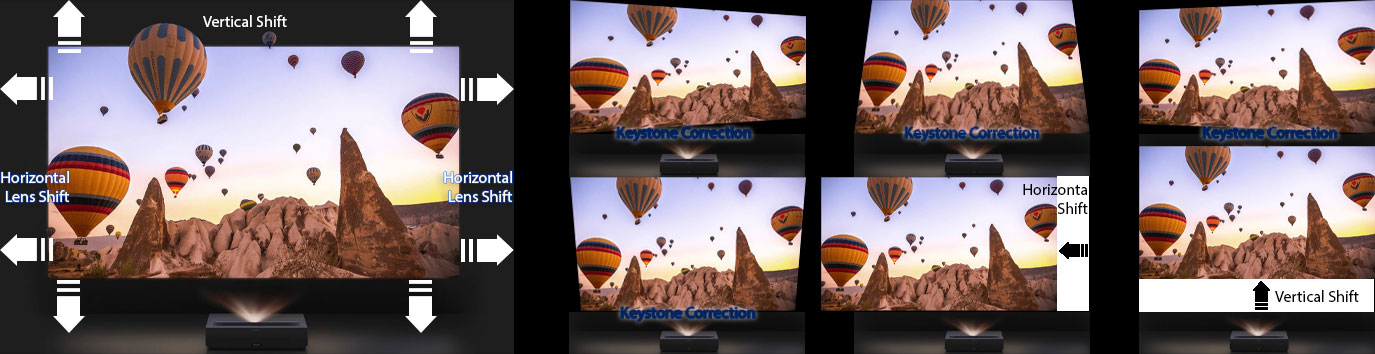
Horizontal lens shift is a feature found in some projectors that allows you to adjust the horizontal position of the projected image without physically moving the projector itself. This adjustment can be helpful when setting up a projector in a location where it's not directly aligned with the centre of the screen or projection surface. Horizontal lens shift provides greater flexibility in projector placement and helps ensure that the projected image is properly aligned and rectangular.
Key points about horizontal lens shift:
-
Adjusting Image Position: Horizontal lens shift allows you to move the projected image horizontally to the left or right, while keeping the projector's position fixed. This is particularly useful when the projector cannot be placed directly in front of the screen due to obstacles, mounting constraints, or other considerations.
-
Maintaining Image Quality: When using digital keystone correction to adjust the image, there can be a loss of image quality due to the adjustment process. Horizontal lens shift, on the other hand, maintains the image's native resolution and sharpness.
-
Flexible Installation: Horizontal lens shift provides greater flexibility in projector placement, making it easier to achieve a centred and aligned image on the screen.
-
Multiple Lens Shift Controls: Some projectors offer both horizontal and vertical lens shift controls, allowing you to adjust the image in both directions for precise alignment.
-
Limitations: While horizontal lens shift is a valuable feature, the range of adjustment may be limited on certain projector models. It's important to check the specifications of the projector to ensure that the lens shift range meets your installation needs.
-
Professional Installations: Horizontal lens shift is particularly beneficial in professional installations, such as conference rooms, classrooms, home theatres, and commercial venues, where precise alignment is crucial for optimal viewing.
-
Projection Geometry: It's important to note that horizontal lens shift does not alter the basic projection geometry. It adjusts the position of the image on the screen but does not correct for distortions caused by uneven projection surfaces or other issues.
Horizontal lens shift is a valuable tool for achieving a properly aligned and visually pleasing projected image, especially in situations where the projector's placement is less than ideal. When setting up a projector, it's recommended to consult the projector's user manual and follow the manufacturer's guidelines for using the lens shift feature effectively.